
Snap press studs (also known as snap buttons or four-part fasteners) are a small but mighty detail in handmade fabric projects. Compared to zippers or Velcro, they’re easier to install, look cleaner, and add a touch of craftsmanship. In this tutorial, we’ll walk you through every step so you can confidently add snap studs to your DIY fabric bag.
🧰 What You’ll Need
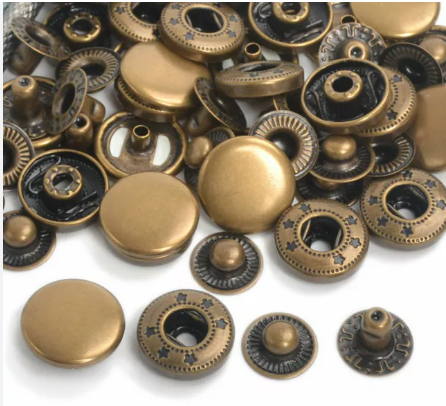
📷 Illustration 1: Tools & Materials Overview
- Snap Press Studs (cap, stud, socket, post)
- Installation tool (snap pliers or hammer + dies)
- Awl or hole punch
- Fabric (cotton, canvas, linen, leather, etc.)
- Ruler & fabric marker or chalk
- Interfacing (optional, for reinforcing thin fabric)
🪡 Step-by-Step Installation
✅ Step 1: Understand the Snap Components
📷 Illustration 2: Breakdown of Snap Parts
(Show 4 components: cap, stud, socket, post)
- Cap: Decorative top, visible on the front
- Stud: Male part that fits into the socket
- Socket: Female part that receives the stud
- Post: Backs the socket or cap from the reverse side
💡 Tip: Cap + stud go on one side of the fabric; socket + post go on the other.
✅ Step 2: Mark & Punch Holes
📷 Illustration 3: Measuring & Punching Hole on Fabric
- Use a ruler to find the exact position
- Mark with a chalk or fabric marker
- Punch a small hole using an awl—just enough for the post to pass through
✅ Step 3: Install Cap + Stud (Front Side)
📷 Illustration 4: Inserting Cap from Front, Placing Stud on Back
- Insert the cap post from the front of the fabric
- Place the stud on the back side
- Use snap pliers or a hammer and die set to press them together
- Make sure it’s aligned and pressed firmly
✅ Step 4: Install Socket + Post (Back Side)
📷 Illustration 5: Installing Socket and Post
- Insert the post from the back of the fabric
- Place the socket on the front side
- Align the parts in your tool, press or hammer gently but firmly
✅ Step 5: Test the Snap
📷 Illustration 6: Snapping the Button Together
- Press both sides together—you should hear a satisfying “click”
- Try opening and closing several times to make sure it’s secure
💡 Pro Tips
📷 Illustration 7: Interfacing on Thin Fabric
- Add interfacing for thin fabrics to prevent tearing
- Practice on scrap fabric before your final piece
- Use the right pressure for different materials (metal vs plastic snaps)
👜 Inspiration & Styling Ideas
📷 Illustration 8: Finished Handmade Bags Showcase
- Add snaps to eco-bags for a neat closure
- Use on coin purses, pouches, baby bibs, or cardholders
- Colorful plastic snaps are great for kids’ items
- Mix and match snap colors to complement your fabric theme
🔚 Final Thoughts
Snap press studs may be small, but they bring a big upgrade to your DIY projects. Once you get the hang of installing them, you’ll want to add them to everything. Whether you’re sewing bags, accessories, or baby clothes, this simple snap can make your work cleaner, neater, and more professional.
So go ahead—grab your tools, and let’s make that satisfying click happen!